前回のサーバ設定編に続いて、次はデータベースとJIRAをインストールします。JIRAについてはこちらに詳しい製品説明があります。
1.MySQLのインストールと設定
作業用のアカウントでサーバにログインし、以下のコマンドを実行します。
[plain]
remote$ sudo yum -y install mysql mysql-server
remote$ sudo chkconfig mysqld on
remote$ sudo chkconfig --list | grep mysqld
こんな感じになっていればOK
mysqld 0:off 1:off 2:on 3:on 4:on 5:on 6:off
remote$ sudo service mysqld start
[/plain]
ここまででMySQLのインストールと起動設定が完了し、すでにMySQLが起動しているはずです。
次にMySQLの初期設定を行います。
[plain]
remote$ mysql_secure_installation
NOTE: RUNNING ALL PARTS OF THIS SCRIPT IS RECOMMENDED FOR ALL MySQL
SERVERS IN PRODUCTION USE! PLEASE READ EACH STEP CAREFULLY!
In order to log into MySQL to secure it, we\'ll need the current
password for the root user. If you\'ve just installed MySQL, and
you haven\'t set the root password yet, the password will be blank,
so you should just press enter here.
Enter current password for root (enter for none): // ENTERを押す
Setting the root password ensures that nobody can log into the MySQL
root user without the proper authorisation.
Set root password? [Y/n] // ENTERを押す
New password: // Rootユーザ用のパスワードを入力
Re-enter new password: // パスワード再入力
Password updated successfully!
Reloading privilege tables..
... Success!
By default, a MySQL installation has an anonymous user, allowing anyone
to log into MySQL without having to have a user account created for
them. This is intended only for testing, and to make the installation
go a bit smoother. You should remove them before moving into a
production environment.
Remove anonymous users? [Y/n] // Enterを押す
... Success!
Normally, root should only be allowed to connect from \'localhost\'. This
ensures that someone cannot guess at the root password from the network.
Disallow root login remotely? [Y/n] // Enterを押す
... Success!
By default, MySQL comes with a database named \'test\' that anyone can
access. This is also intended only for testing, and should be removed
before moving into a production environment.
Remove test database and access to it? [Y/n] // Enterを押す
- Dropping test database...
... Success!
- Removing privileges on test database...
... Success!
Reloading the privilege tables will ensure that all changes made so far
will take effect immediately.
Reload privilege tables now? [Y/n] // Enterを押す
... Success!
Cleaning up...
All done! If you\'ve completed all of the above steps, your MySQL
installation should now be secure.
Thanks for using MySQL!
[/plain]
これでrootユーザのパスワードが設定され、その他最低限のセキュリティ対応が完了しました。
最後にJIRAで使うデータベースの作成と、JIRA用のアカウントを作成します。
[plain]
remote$ mysql -u root -p
Enter password: // 先ほど設定したrootユーザ用のパスワードを入力します
Welcome to the MySQL monitor. Commands end with ; or g.
Your MySQL connection id is 533
Server version: 5.1.66 Source distribution
Copyright (c) 2000, 2012, Oracle and/or its affiliates. All rights reserved.
Oracle is a registered trademark of Oracle Corporation and/or its
affiliates. Other names may be trademarks of their respective
owners.
Type \'help;\' or \'h\' for help. Type \'c\' to clear the current input statement.
// データベースの作成
mysql> CREATE DATABASE データベース名 CHARACTER SET utf8 COLLATE utf8_bin;
mysql> GRANT ALL PRIVILEGES ON . TO ユーザー名@localhost IDENTIFIED BY \'パスワード\' WITH GRANT OPTION;
mysql> FLUSH PRIVILEGES;
[/plain]
2.JIRAのインストールと設定
続いてJIRAをインストールします。
[plain]
remote$ cd
remote$ wget atlassian.com/software/jira/downloads/binary/atlassian-jira-5.2.1-x64.bin
remote$ chmod a+x atlassian-jira-5.2.1-x64.bin
remote$ sudo ./atlassian-jira-5.2.1-x64.bin
以降、何度か質問されますがそのままEnterを押して完了してください
[/plain]
以上でJIRAのインストールが完了です。
この時点ですでにJIRAが起動していますが、MySQLのJDBCドライバを設定する必要があります。
MySQLのDownload Connector/Jにアクセスします。
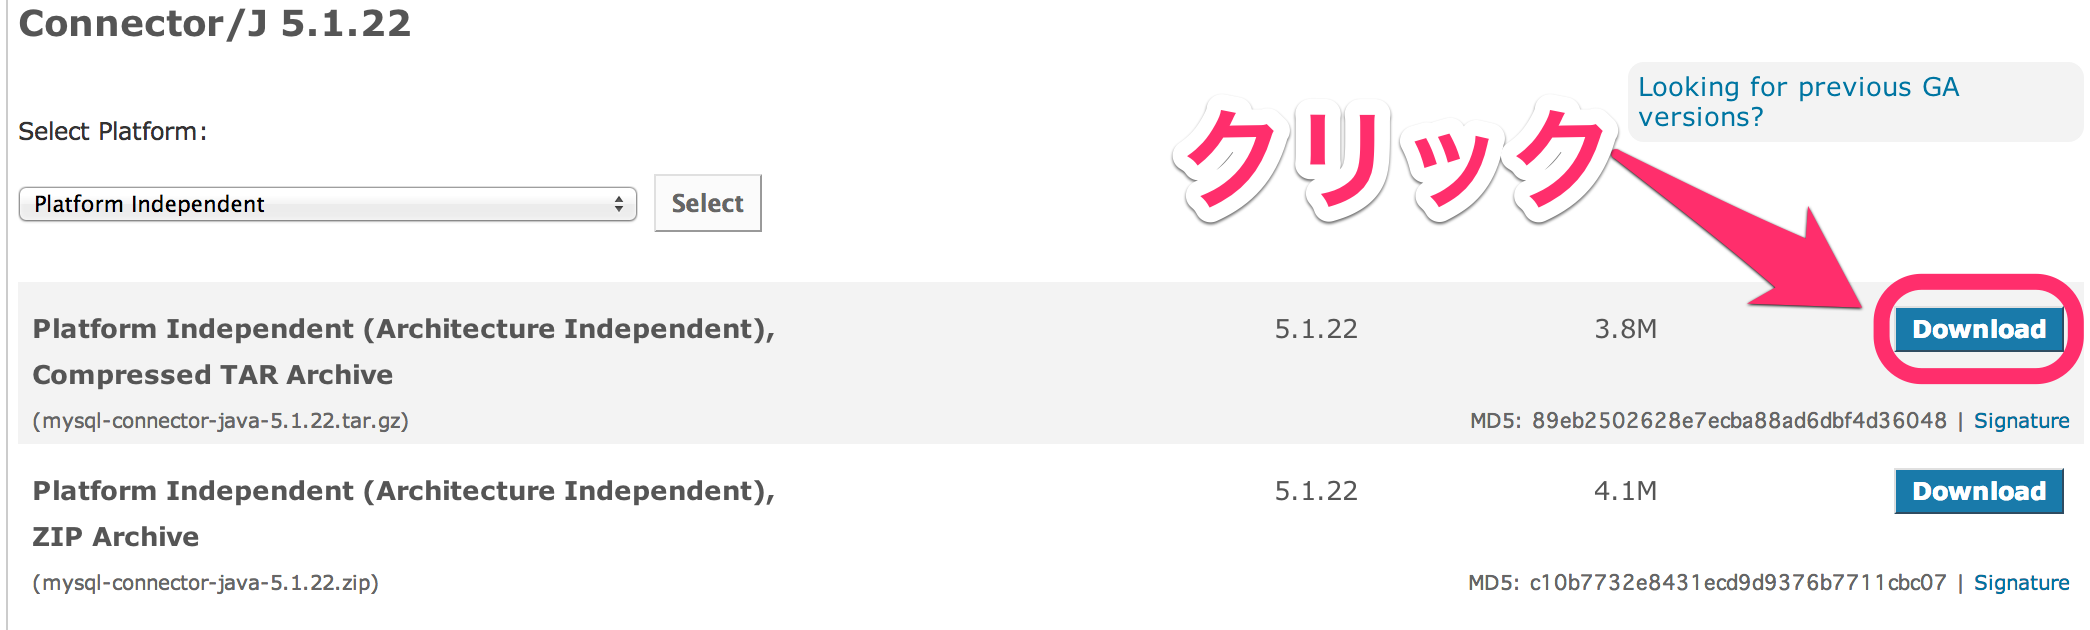
作業PCにダウンロードが完了したらファイルをサーバへアップロードします。
[plain]
local$ scp mysql-connector-java-5.1.22.tar.gz (ホスト名):
local$ ssh (ホスト名)
サーバにファイルがあるか確認します
remote$ ls
ファイルの確認後、展開します。
remote$ tar zxvf mysql-connector-java-5.1.22.tar.gz
remote$ cd mysql-connector-java-5.1.22
ドライバファイルをJIRAのライブラリ用ディレクトリにコピーします
remote$ sudo cp mysql-connector-java-5.1.22-bin.jar /opt/atlassian/jira/lib
すでにJIRAが起動しているので、再起動します。
JIRA停止用のコマンド
remote$ sudo /opt/atlassian/jira/bin/shutdown.sh
JIRA起動用のコマンド
remote$ sudo /opt/atlassian/jira/bin/startup.sh
JIRAのログを確認したい場合は以下のコマンドを実行してください
remote$ sudo tail -f /opt/atlassian/jira/logs/catalina.out
[/plain]
4.起動確認
JIRA起動後しばらく経ったところでブラウザから下記のURLへアクセスします。
(ホスト名はhttps://secure.sakura.ad.jp/vpscontrol/main/から確認してください)
成功するとJIRAセットアップ画面が表示されます。
- 手順 1/4 基本設定
- サーバ言語:日本語
- データベース接続:外部
- データベースタイプ:MySQL
- ホスト名:localhost
- ポート:そのまま
- データベース:MySQLに作成したデータベース名
- ユーザ名:MySQLに作成したユーザ名
- パスワード:MySQLに作成したパスワード
- スキーマ:そのまま
このように設定したところで接続テストボタンを押してください。
接続に成功したらあとは画面の指示にしたがって進めてください。
JIRAのセットアップが完了すると通常時にJIRA画面が表示されます。